¶ Student Profile
To view or edit a student's information:
- Use the search functionality to locate the student.
- After retrieving the list of students, select the desired name.
- After selecting a student, the admin can view and edit fields in the student’s profile (editable fields are not greyed out).
- Click the save button to capture changes before switching tabs or exiting.
NOTE: The available features and editing options depend on the security roles assigned to the user.
The student tab has 4 main subtabs:
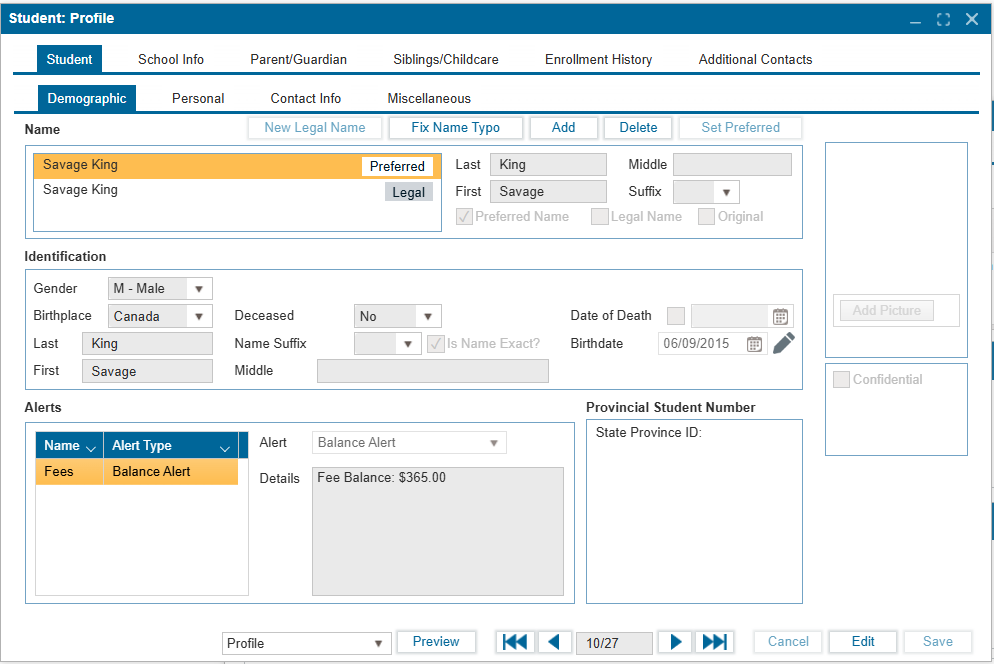
¶ Demographic Subtab
The Demographic subtab under the Student tab captures the basic information provided during registration and enrollment.
¶ 1. Name
- Fields: Last, First, Middle, Suffix
- Tags: Preferred, Legal, Original
¶ Buttons (no edit mode required)
- New Legal Name – Edit the student’s legal name, date of birth (DOB), and select the associated document.
- Fix Name Typo – Correct errors in an existing name. If multiple names exist, select the name to update before applying the fix.
- Add – Add an additional name.
- Delete – Remove a selected name.
- Set Preferred – Mark a selected name as the student’s preferred name.
¶ 2. Add Picture
- A student’s picture can be uploaded in Edit Mode by clicking Add Picture.
¶ 3. Confidential Checkbox
- When checked, the student’s information becomes inaccessible until the Confidential Password in (System Configuration:School Preferences) is entered.
¶ 4. Identification
- Editable Fields (in Edit Mode): Gender, Birthplace, Deceased, Date of Death
- Birthdate: Can be updated by clicking either the Pencil icon or the New Legal Name button.
¶ 5. Alerts
This section displays alerts such as medical conditions (e.g., allergies) or neurodiversity conditions (e.g., ADHD) entered during registration.
¶ Actions
- Existing alerts are listed with their name and type.
- To add a new alert, click the “+” icon (includes options such as Others).
- Only alerts added in this section can be removed using the Trash icon.
¶ 6. Provincial Student Number
- Displays the student’s Provincial ID Number, as assigned by the province.
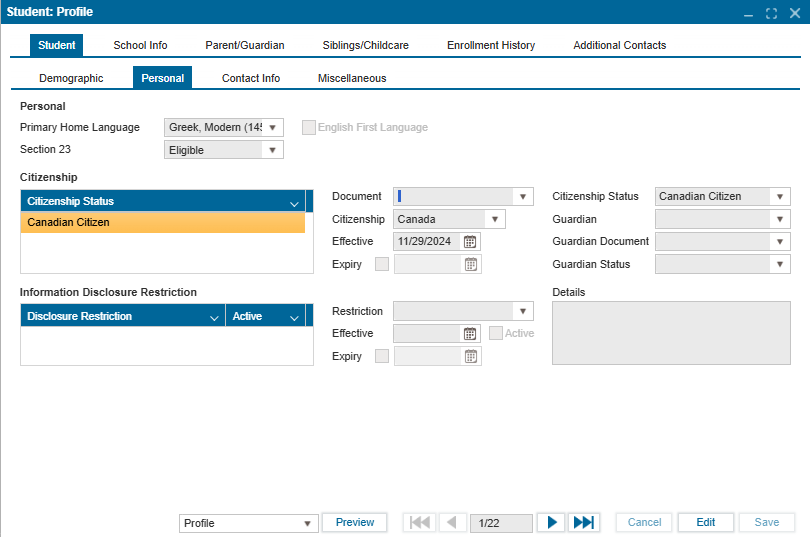
¶ Personal Subtab
The personal subtab captures information about the student’s primary language, citizenship status, and information disclosure restriction.
- Personal:
- Primary Home Language: Indicates the primary language spoken at home. Can be updated by selecting the correct language from the dropdown.
- English First Language Checkbox: Indicates English as the student’s first language. Can be edited by checking or unchecking the box.
- Section 23: Student is considered ineligible if their primary home language and language of instruction in school is not French.
- Citizenship:
- Citizenship Status: Carried forward from the information provided during the application process. Additional information can be added in edit mode.
- Information Disclosure Restriction: Add restrictions from the dropdown options and enter details in the free-text field. Click “Save” to save changes.
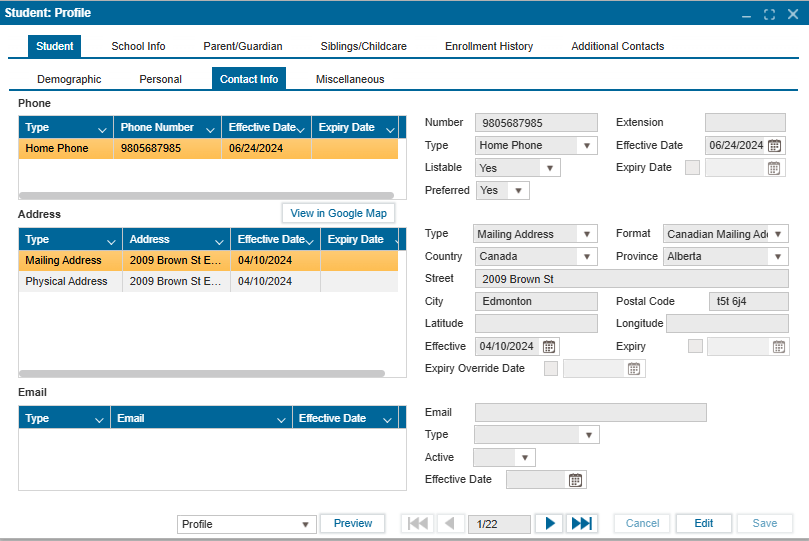
¶ Contact Info Subtab
This tab houses the phone number, mailing/physical addresses, and email address.
- To add a new phone number, mailing/physical address, or email address:
- In edit mode, select the “+” button.
- Fill in the fields to the right of the appropriate contact section.
- Click save to ensure updated or new information is saved.
- To delete, click on the trash icon at the top of the contact information section. There is no warning before the selected record is deleted.
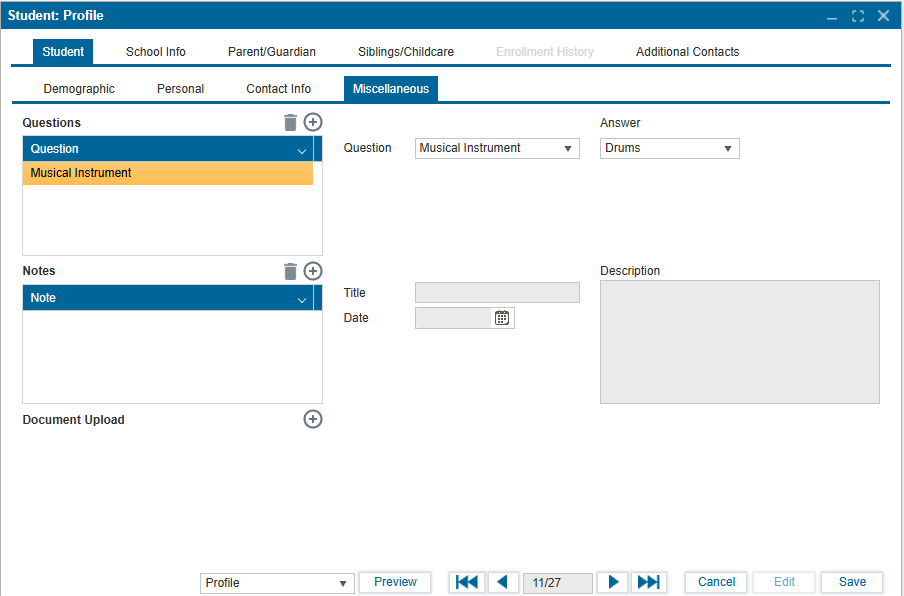
¶ Miscellaneous
The miscellaneous tab displays user-definable special questions and answers, additional notes, and descriptions. Special questions are defined in Setup > Special questions.
To add a special question:
- Search for and select the student from the Student List.
- Navigate to
Student > Profile. - Select the Miscellaneous subtab.
- Click Edit.
- Click the dropdown arrow in the category field to select the category.
- Select the question from the drop-down list in the Question field (this is setup in System Configration: Registration: Custom Fileds)
- Enter the answer in the “Answer” textbox.
To enter notes:
- Click the dropdown arrow in the Notes grid and click the “+” button.
- The default date is today’s date.
- Enter the title in the title field and the description in the textbox on the right.
- Click Save.
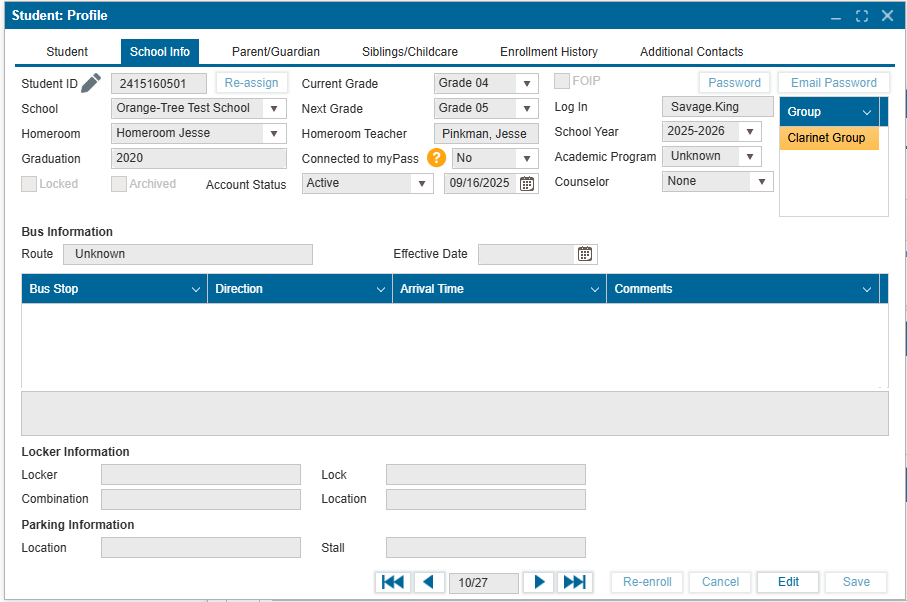
¶ School Info Tab
The School Info tab provides detailed information about a student’s school records.
¶ Steps to Access
- Search for and select the student from the Student List.
- Click on School Info to open the tab.
¶ Student ID
- Re-Assign Button (Edit mode): Reassigns a student ID based on the configuration in System Configuration → School Preferences.
- Pencil Icon (View mode): Manually enter a student ID (9–12 digits).
¶ Editable Fields (in Edit mode only)
- Current Grade – Select from dropdown.
- FOIP Checkbox – Enable/disable as required.
- Log In – Update the student’s username for the public portal.
- Password Button: Change the student’s password.
- Email Password: Send a new system-generated password to the student’s email.
- Group – View all groups the student belongs to.
- To assign:
- Expand the Group section.
- Click Add.
- Select a group from the dropdown.
- Click Save.
- To assign:
- Homeroom – Assign/update homeroom.
- Connected to myPass – Update connection status.
- Academic Program – Specify or update academic program.
- Locked Checkbox – Prevents student account access from the public portal.
- Archived Checkbox – Moves account into archive with selected status (archived accounts are excluded from basic student searches).
- Counselor Dropdown – Assign a counselor.
¶ Notes
- Use this tab to add any information not captured during registration/enrollment.
- Greyed-out fields are read-only and cannot be edited.
- Bus and Locker Information appear as read-only values (pulled from Student - Miscellaneous).
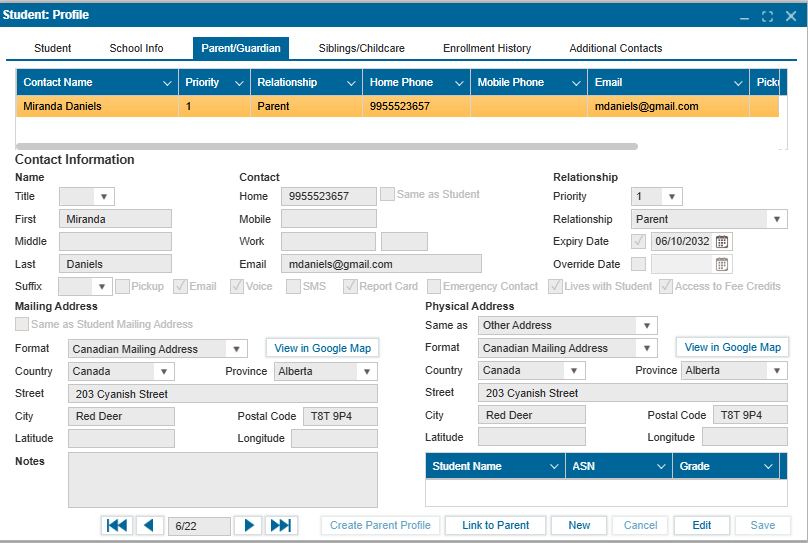
This tab stores contact information and addresses for parents or guardians. Details are typically entered during the student's registration process.
-
Adding a Parent/Guardian:
- Search for the student and select them from the student list.
- Navigate to the Parent/Guardian tab.
- Click New.
- Complete all the necessary fields.
- Click Save.
-
Editing Parent/Guardian Information:
- To update or add more details, click Edit.
- After making your changes, click Save.
- You can enter additional notes related to a parent/guardian in the Notes section at the bottom of the page.
- "Link to Parent": TBD
- "Create Parent Profile": TBD
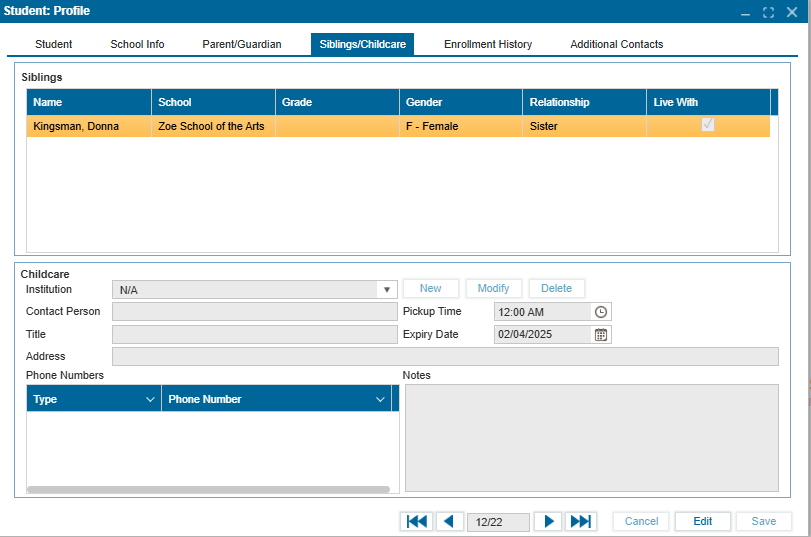
The Siblings/Childcare tab displays information about a student's connected siblings and childcare arrangements.
Adding a Sibling:
- Search for the student and select them from the search results.
- Navigate to Student > Profile.
- Click on the Siblings/Childcare tab.
- Click Edit.
- In edit mode, click +.
- Select the sibling from the student search results and click Save.
Managing Childcare Information:
-
To Add Childcare Information:
- In edit mode, click New.
- Enter the name of the institution.
- Click (...) to provide the institution's address.
- Click + to add the institution's phone number.
- Click Save to return to the previous window.
- Enter the contact person, title, pickup time, and expiry date.
- Add any additional notes in the Notes field and Save.
-
To Modify Childcare Information:
- In edit mode, select the institution from the dropdown in the institution field.
- Click Modify.
- Update the institution's name, address, and phone numbers in the pop-up window.
- Click Save in the pop-up window to return to the previous screen.
- Click Save on the Siblings/Childcare tab to confirm changes.
-
To Delete Childcare Information:
Note: There is no confirmation pop-up. Once deleted, the record cannot be recovered.
- In edit mode, select the institution to be deleted from the dropdown field.
- Click Delete.
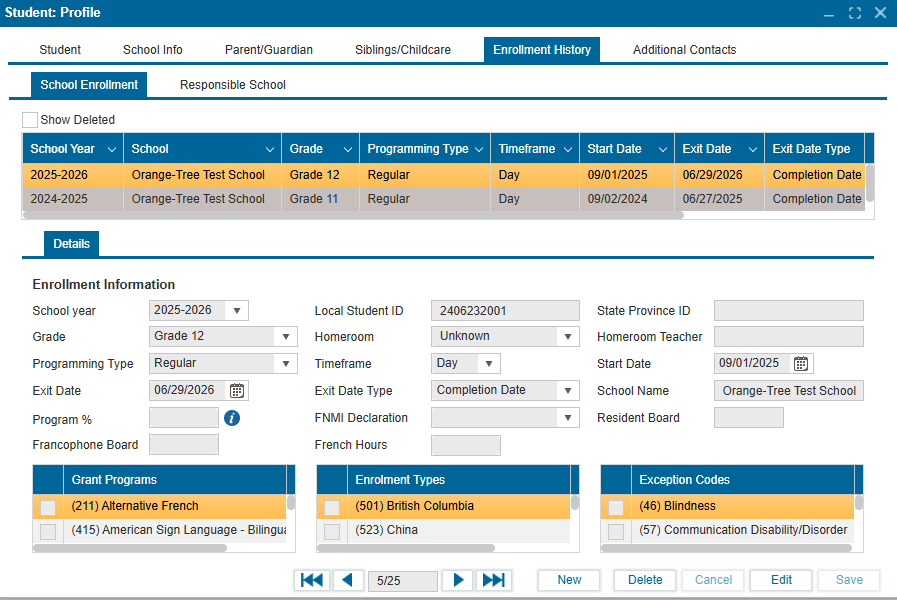
¶ School Enrollment
The School Enrollment tab provides a complete record of a student’s current and past school enrollments, along with the responsible school information. The table below shows the list of all previous and current enrollment(s).
- The “Show Deleted” checkbox pulls and displays any deleted enrollment record.
- Clicking on a record row automatically updates the Enrollment Information section with information for the selected enrollment.
- The enrollment information table can be edited by Admins.
- New Enrollment records can be created for students by clicking “New”.
Note: Enrollment records are what determine whether a student appears in a specific School Year Search. If a student does not have a School Enrollment Record for a given year, they will not display in search results for that school year.
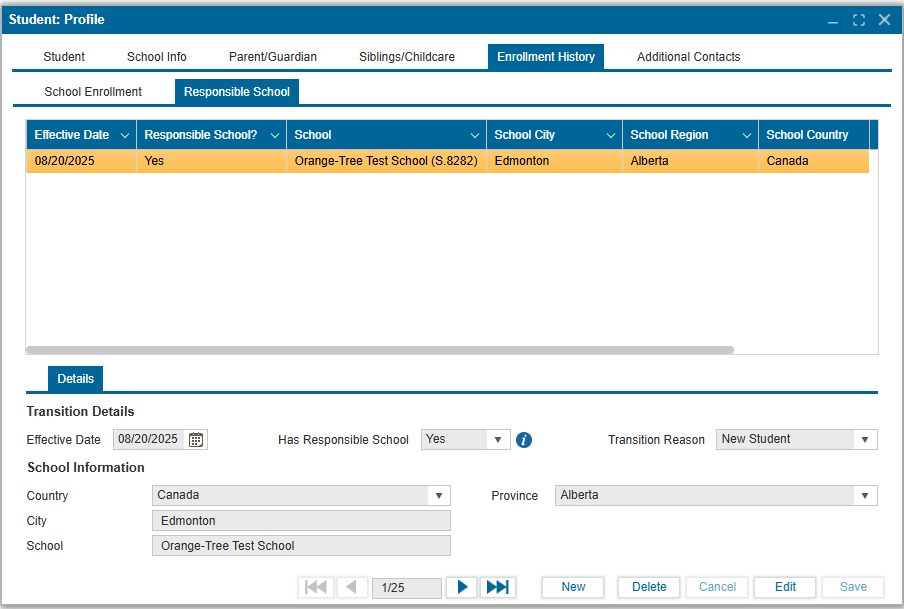
¶ Responsible School
The Responsible School tab records the school that holds responsibility for the student.
- The table lists all responsible school records with details such as Effective Date, School, City, Region, and Country.
- Selecting a record updates the Transition Details and School Information section below.
- Responsible school records can be edited by administrators.
- New responsible school records can be created using the New button.
Note: The responsible school record defines which school is officially accountable for the student during the given timeframe.
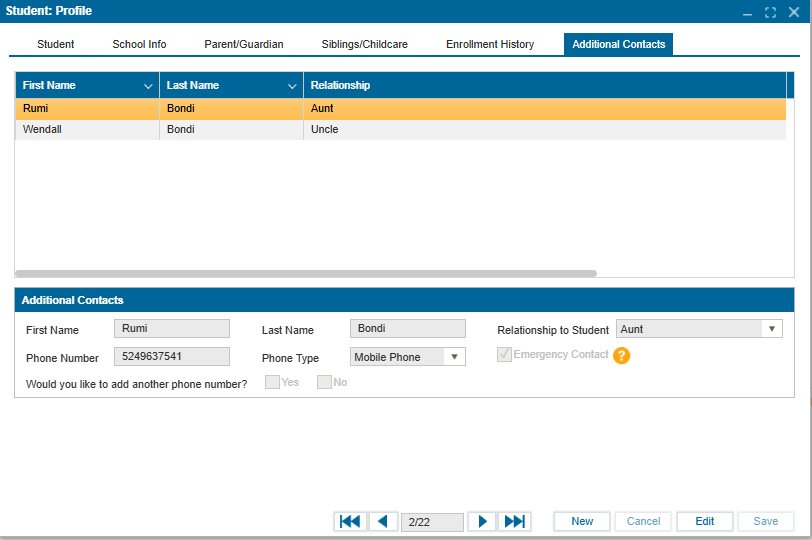
The Additional Contacts tab provides the list of contacts added during the registration process. More contact information can be added here to the student profile.
Managing Additional Contacts:
- Search for the student and select them from the search results.
- Navigate to Student > Profile.
- Click on the Additional Contacts tab.
- Click New.
- Fill in all the necessary fields in the Additional Contacts section.
- Use the Emergency Contact checkbox to designate the contact as an emergency contact.
- To add additional phone numbers, select the Yes checkbox.
- Click Save to confirm changes.
- To delete a contact record, click the trash icon beside the contact.
- To modify an existing record, use Edit mode.