¶ Student Fees
¶ Overview
The Student Fees feature is available in both the Admin Portal and the Public Portal, with admins having enhanced access and functionality.
¶ Admin Portal – Student Fees
School administrators can:
- Assign, remove, waive, refund, and pay fees
- Add credit to a student’s account
- View grants awarded to a student
- Access and manage the full fees list
- Review fee history and transaction details
- Generate and preview fee-related reports
- Send fee reports directly to parents via email
¶ Credits
Two types of credits can be applied to pending fees through Office → Fees:
- Student Credit
- Grants
¶ Additional Functionalities
- Admins can view fees for siblings linked in Student Profile → Siblings/Childcare.
- The Fees History grid records all financial transactions, syncing with other ISMS modules and features.
- Admins can process three types of student payments: Credit Card, Credit on Account, and Grant.
¶ Public Portal – Student Fees
Students and parents/guardians can:
- View the fees list
- Make payments using credit cards or available account credits
- Access fee reports
- Review transaction history via the Fee History grid
¶ Payment Requirement
- At least one fee must be selected from the current fees grid to enable the Pay button.
- The user must complete all required fields in the Pay Fee screen and select a payment method to proceed.
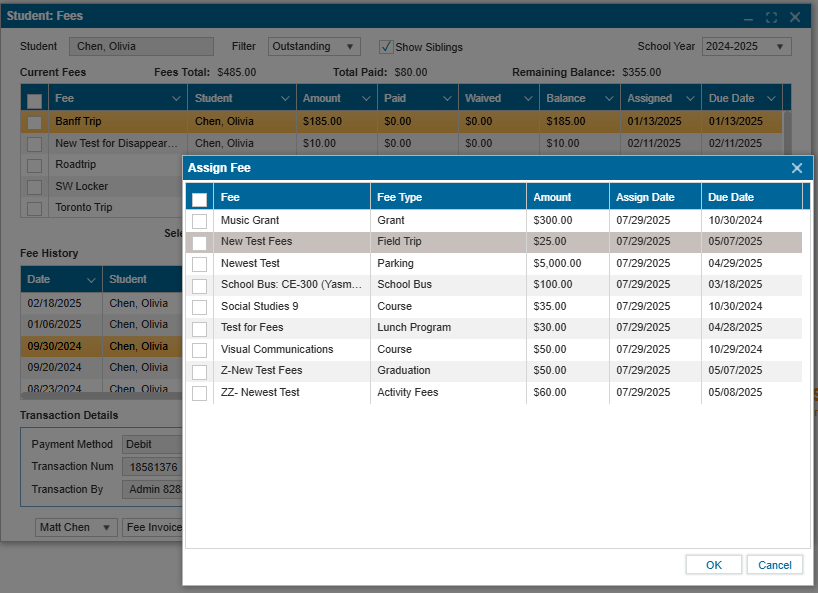
¶ Assigning a New Fee
The top grid shows the list of pending fees that have already been assigned to the student.
To assign a new fee:
- Click Assign to open the Assign Fee popup.
- Select the desired fee(s) using the checkbox, then click OK.
- The selected fee(s) will appear in the top grid of the Student Fees feature.
Notes:
- If no fees appear in the Assign Fee popup, it means no fees have been created. Refer to the Office Fee: Create and Assign Guide for steps on creating new fees.
- A fee can be removed using the Remove button only if no payment has been made on that fee.
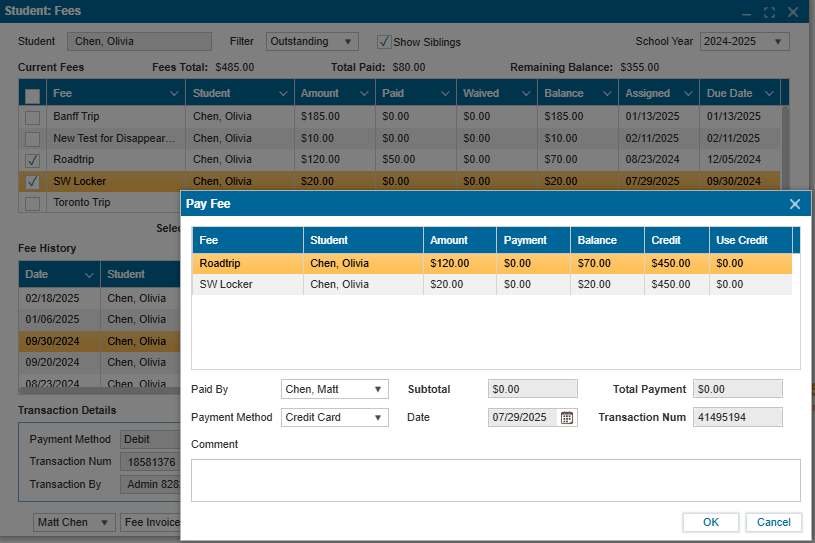
¶ Making a Payment
To submit a payment:
- Select one or more fees using the checkboxes.
- Click Pay.
- In the Payment column, enter the amount you wish to pay for each selected fee.
- Choose a Payment Method from the dropdown menu.
- Click OK.
¶ If Paying by Card
- In the Process Payment popup, enter your card details and click Submit Payment.
- (Optional) Check Save this payment method to securely store the card for future payments.
- If a card is saved, simply select it from the Select a Payment Account dropdown to make future payments without re-entering card details.
¶ Using Credits or Grants
- If the student has available credit or grant, enter the amount you wish to apply from the respective Credit or Grant column.
- This amount will be deducted from the total payment due.
¶ Fee History
- Every successful payment creates a record in the Fee History table.
- Selecting a record from this table displays the transaction details at the bottom of the screen.
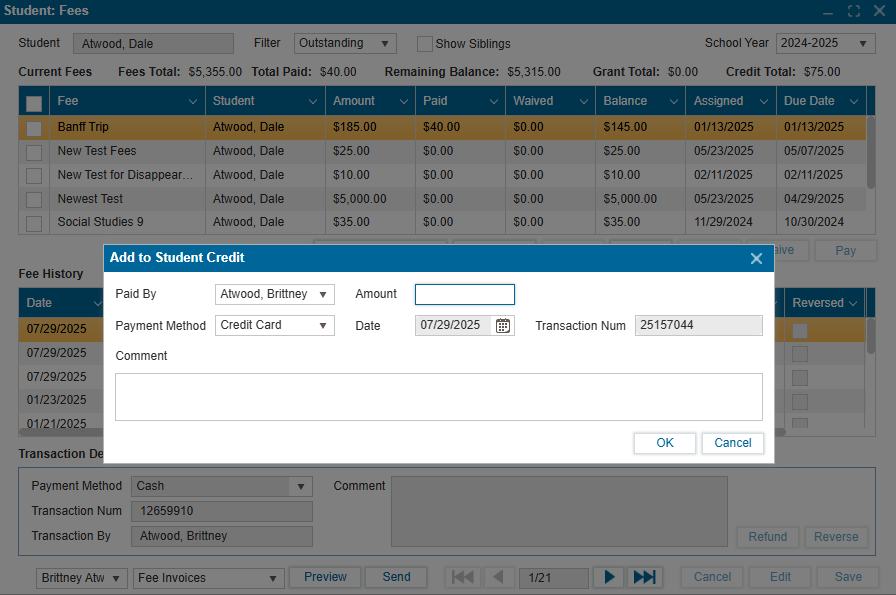
¶ Adding to Student Credit
- Click the Add to Student Credit button.
- Enter the amount to be credited to the student’s account.
- Select the Payment Method from the dropdown.
- If paying by card, enter the card details and click Submit Payment.
- The updated credit balance will display next to the "Credit Total" label at the top of the window.
¶ Waiving and Refunding Fees
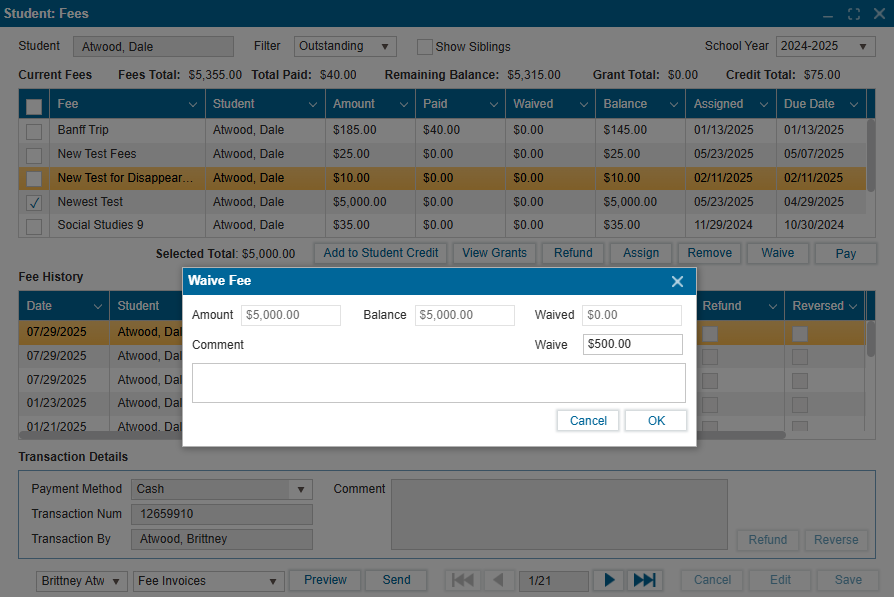
¶ To Waive a Fee
- Select the fee using the checkbox.
- Click Waive.
- Enter the amount to be waived.
- Click OK.
- The waived amount will appear in the Waived column on both tables, and the remaining balance will be recalculated and updated on the top table.
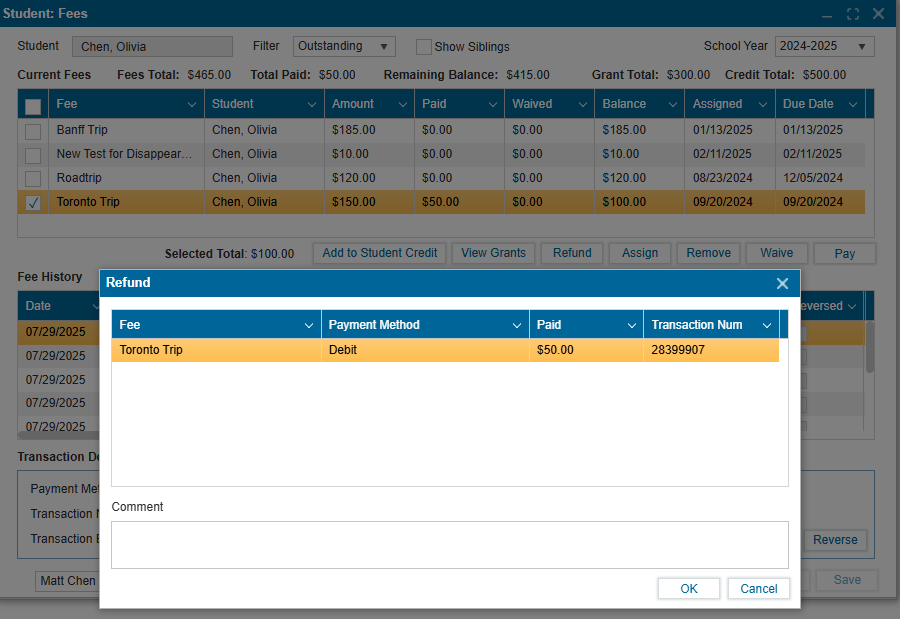
¶ To Refund a Fee
- Select a paid fee using the checkbox.
- Click Refund, then OK.
Additional Notes:
- Both Refund buttons on this screen can process partial refunds for payments made toward a total fee.
- Once a full payment is made, you can refund it by:
- Using the Refund button at the bottom of the Fee History section, or
- Filtering for Paid Fees at the top of the window via the Filter dropdown and using the top Refund button.
¶ Key Difference between Refund Buttons
- The top Refund button returns the exact amount to the original payment method.
- The bottom Refund button allows refunding partial amounts as needed.
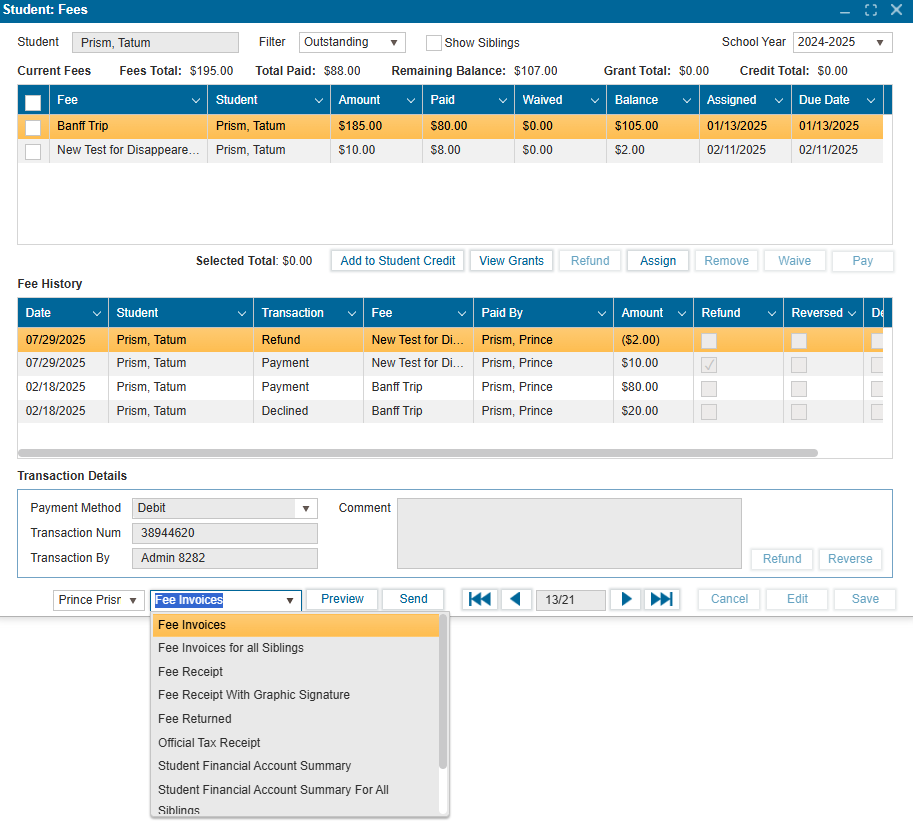
¶ Reports
A list of pre-made Reports is available via the dropdown menu at the bottom of the window.
- Click the dropdown to view all available reports.
- Highlight to select a report and click Preview to view, save, or print it.
- Use the Send button to customize the email message and send the selected report to the parent associated with the student.