¶ Track Information ⚙️
Note: Ensure the school year setup is complete before entering track information.
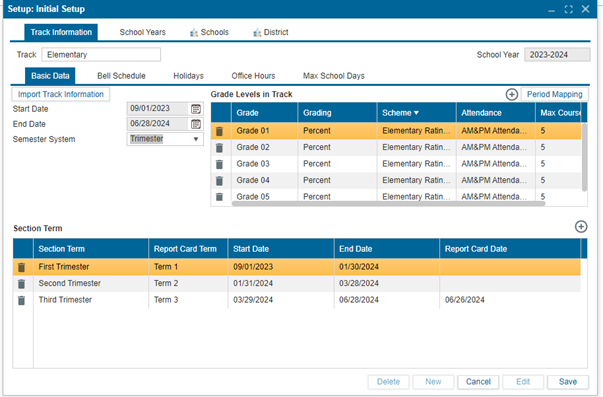
¶ Basic Data Subtab 📋
¶ To Edit an Existing Track or Create a New Track in Initial Setup:
- Navigate to
Setup > Initial Setup. - Select the Track Information tab.
- Go to the Basic Data subtab.
¶ To Modify an Existing Track:
- Select the track from the Track field dropdown.
- Click
Editto make changes. ✏️
¶ If Importing an Existing Track:
- Click
Import Track Information. 📥
6.1. In the Import Track Information window:- Select the school year, school, and track to import from.
6.2. In the What to Import section, use the checkboxes to select the information to import. ☑️
6.3. ClickOK. ✅
- Select the school year, school, and track to import from.
¶ If Setting Up a New Track:
-
Click
Newto enter information for a new track.
7.1. Enter the name of the new track and clickOK.
7.2. In the Grade Levels in Track section:- Click the
+button - Select the grade using the dropdown in the grade column.
- Repeat for all other columns in this section.
7.3. In the What to Import section, use the checkboxes to select what to import.
7.4. Specify the semester system (this controls what is seen in the Section Term below).
7.5. In the Section Term, adjust the start date, end date, and report card date as needed. 🗓️
- Click the
-
Click
Saveto apply changes. 💾 -
Use the Period Mapping button to map periods if the school has different period durations for tracks.
-
To delete a track, click the delete button 🗑️ to remove the track currently displayed in the Track field.
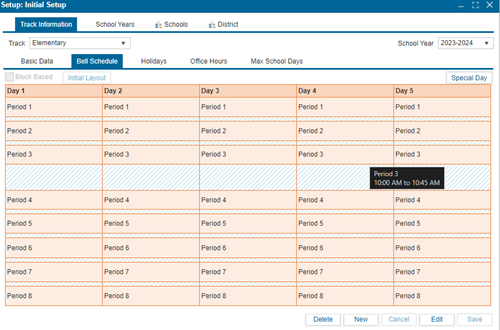
¶ Bell Schedule Subtab ⏰
¶ To Set Up the Bell Schedule:
- Navigate to
Setup > Initial Setup. - Select the Track Information tab.
- Go to the Bell Schedule subtab.
- To create a new schedule:
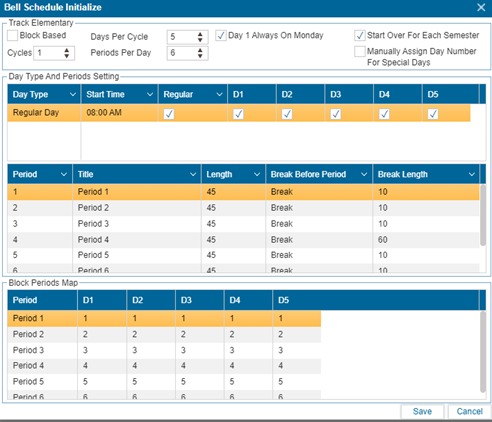
4.1. In Edit, clickInitial Layoutat the top of the page.
4.2. The Bell Schedule Initialize window will pop up.- If the schedule is block-based, check the Block Based checkbox.
- If it is period-based, leave the box unchecked.
- Specify the cycles based on school preferences.
- Specify the number of days per cycle.
- Specify the number of periods per day (if periods are used) or blocks per day (if blocks are used).
- Specify if Day 1 always starts on Monday using the checkbox.
- Check the Start Over for Each Semester checkbox if applicable to your school.
- Check the Manually Assign Day Number for Special Days checkbox if applicable to your school.
- The Days Per Cycle and Periods Per Day selections create the structure in the Day Type and Periods Setting section.
- Adjust the start time by clicking on the time and setting it to the preferred time.
- Modify days using the checkbox in each day column (e.g., D1 means Day 1, D2 means Day 2, etc.).
- Customize the following fields as needed:
- Period Title
- Length
- Break Before Period
- Break Length
- Use Block Period Maps to specify double periods if necessary. For example, if Period 3 is a double, it will consist of two Period 3's followed by Period 5.
- Click
Saveto confirm changes. 💾
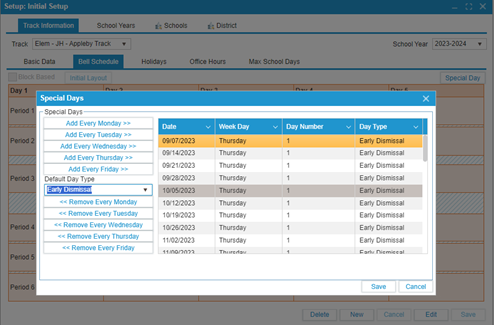
¶ Special Days ⭐
Special days allow users to define exceptions.
¶ To Set Up Special Days for a School:
- Navigate to
Setup > Initial Setup. - Select the Track Information tab.
- Go to the Bell Schedule subtab.
- Click the Special Days button.
- Specify the special days (e.g., to mark every Friday as a special day, select
Add Every Friday). - Click
Saveto confirm changes. 💾
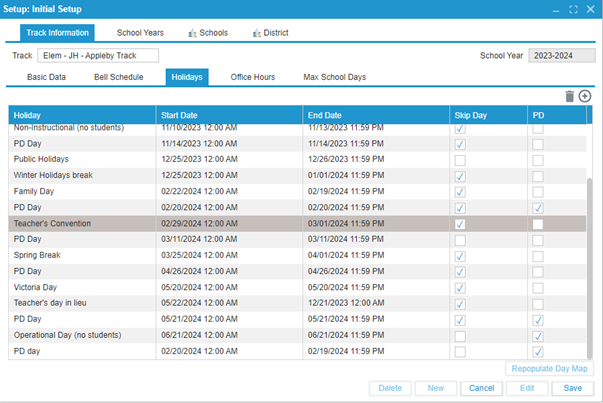
¶ Holidays Subtab
¶ To Set Up Holidays:
- Navigate to
Setup > Initial Setup. - Select the Track Information tab.
- Go to the Holidays subtab.
- To add a holiday:
4.1. Click the dropdown arrow in the Track field and selectEdit.
4.2. Click the+button to create a new holiday. - Name the holiday.
- Set the start and end dates. 📅
- Indicate if it is a Skip Day or PD (Professional Development) day:
- Check the Skip Day checkbox to skip the day scheduled for the holiday and resume the schedule the day after. ⛔
- Click
Saveto confirm changes. 💾 - If the school day is not skipped, click
Repopulate Day Mapto adjust the schedule. 🔄
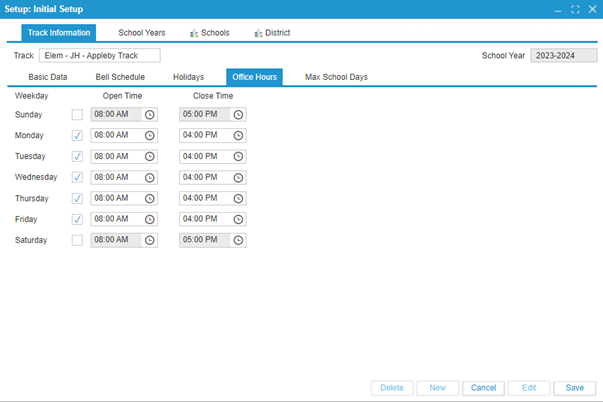
¶ Office Hours Subtab 🕙
¶ To Add Office Hours:
- Navigate to
Setup > Initial Setup. - Select the Track Information tab.
- Go to the Office Hours subtab.
- In Edit mode, use the checkboxes and time picker to specify the days and times the office is open.
- Click
Saveto confirm changes. 💾
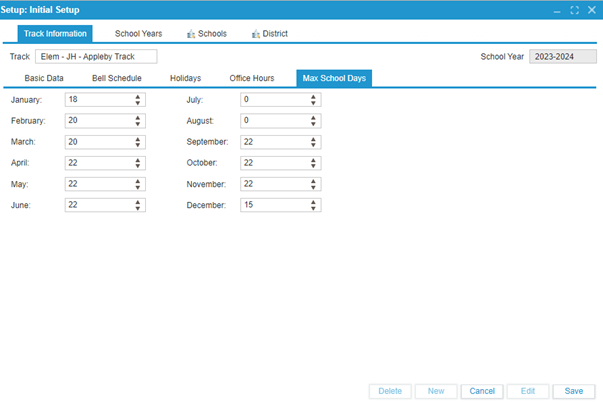
¶ Max School Days Subtab 📆
The Max School Days feature logs the maximum number of operational days for the school each month. This data is used in reports to compute absence percentages, providing valuable insights into attendance trends.
¶ To Set Up Max School Days:
- Navigate to
Setup > Initial Setup. - Select the Track Information tab.
- Go to the Max School Days subtab.
- In Edit mode, enter the max school days for each month.
- Click
Saveto confirm changes. 💾