¶ Communication
The Communication feature allows school staff to send Announcements, Messages, and Banners to selected recipients within the school. Depending on the communication type, messages can be delivered to staff, students, parents, or specific roles, and displayed in portals or sent via email, SMS, or voice.
¶ Communication Types
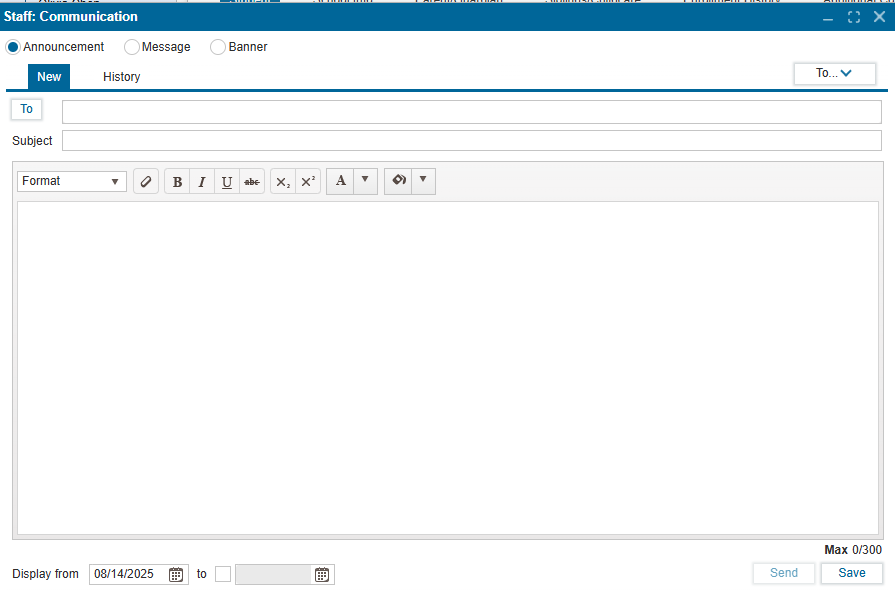
¶ Announcement
-
Used for general school-wide or targeted announcements.
-
Appears in the recipients’ Announcements area.
-
Can include formatted text and a display period (start and end date).
-
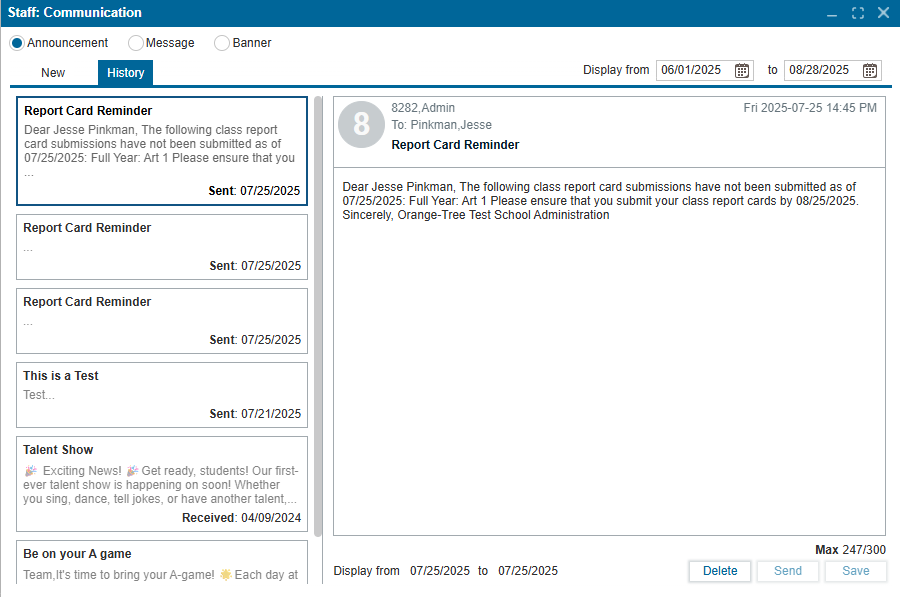
Tabs:
- New - Compose a new announcement.
- History - View past announcements with date range filters.
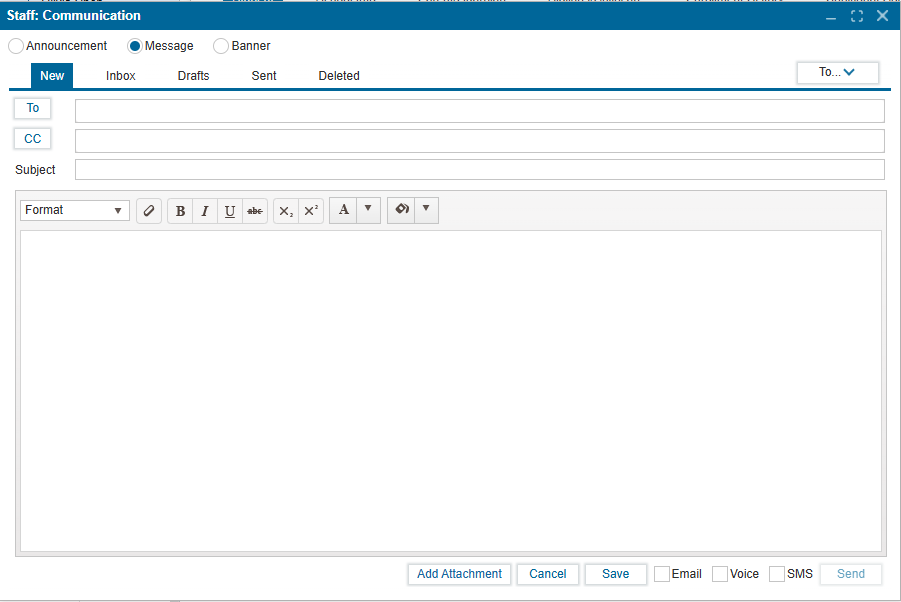
¶ Message
-
Used for direct or group communication between staff, students, and parents.
-
Can be sent as Email, Voice, or SMS.
-
Allows CC recipients and attachments.
-
Tabs:
- New - Compose a new message.
- Inbox - View received messages (filter by date range).
- Drafts - View and edit saved drafts.
- Sent - View sent messages (filter by date range).
- Deleted - View deleted messages (filter by date range).
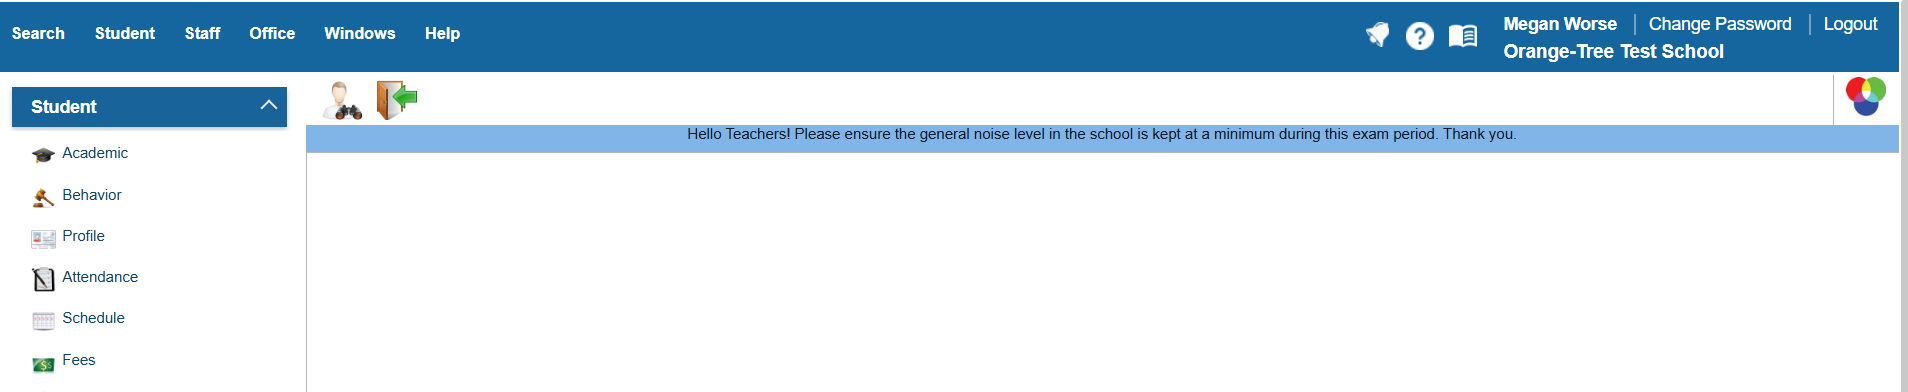
¶ Banner
- Displays as a notification bar at the top of the recipient’s portal immediately upon login.
- Remains visible until the set end date.
- Useful for urgent notices, reminders, or important information (e.g., exam schedules).
- Shares the same recipient selection options as Announcements and Messages.
¶ Creating a New Communication
Navigate to Staff: Communication
-
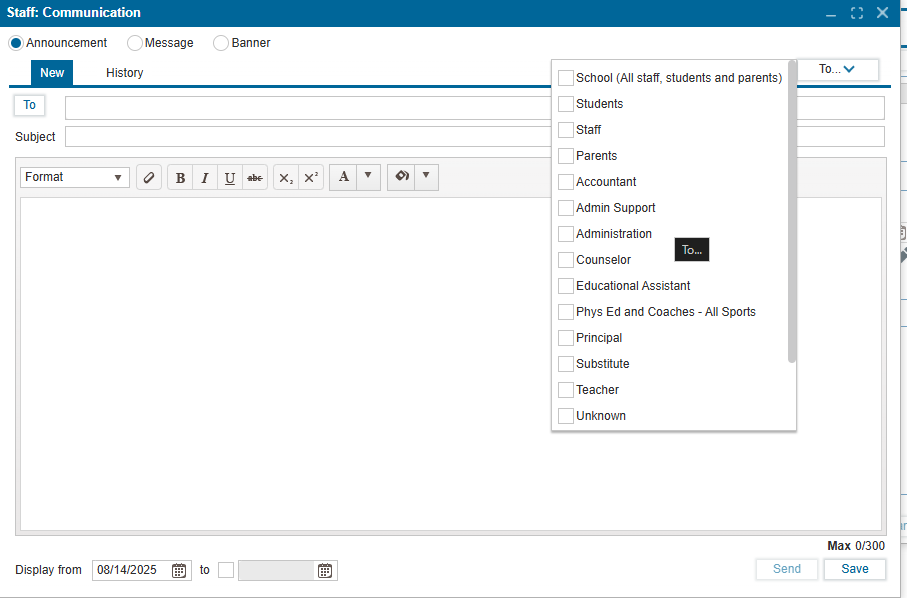
Select Communication Type
- Choose Announcement, Message, or Banner at the top of the screen.
-
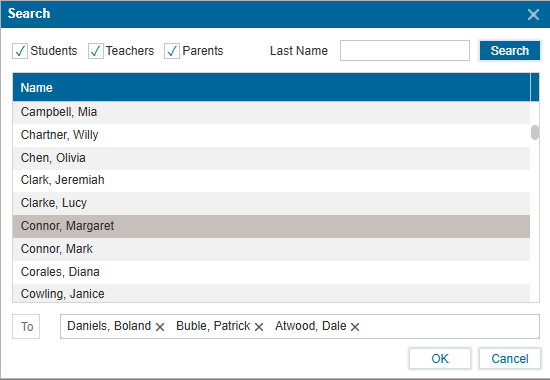
Choose Recipients
- Click the To… button to open the recipient selection menu.
- Options:
- Select by Group – e.g., School, Students, Staff, Parents, or specific staff roles (Administration, Principal, Counselor, etc.).
- Search by Name – Check boxes for individual recipients (students, teachers, parents).
- Selected names/roles will appear in the To field.
-
Enter Subject and Content
- Subject – Provide a clear, concise title.
- Body – Use the formatting toolbar for bold, italics, underline, bullet points, font size, and alignment.
- For Messages, optional CC field is available.
4. Set Display Dates (Announcements/Banners only)
- Display from – Select the start date.
- To – Select the end date (leave blank for ongoing display).
-
Add Attachments (Email only)
- Click Add Attachment to include files.
-
Select Delivery Method (Messages only)
- Choose one or more: Email, Voice, SMS.
-
Save or Send
- Send – Immediately send the message/announcement/banner.
- Save – Store as a draft for later editing.
¶ Viewing Communication History
¶ Announcements
- Go to History tab.
- Filter by date range.
- Select an item to preview the full content.
¶ Messages
- Go to Inbox, Sent, or Deleted tabs.
- Filter by date range.
- Click on a message to view details.
¶ Banners
- Not stored in a separate history list but remain active until the set end date expires.